Turn screen recordings into editable tutorial scenes

The hardest part of a software tutorial often begins after the recording ends. A menu label changes. One task needs a longer explanation. A private notification appears between two useful moments. The camera should focus on a small control, but the original capture shows the whole screen. When the source is one long clip, every revision becomes a trimming and timing problem.
Scribe Animator takes a different approach: record the workflow in meaningful steps, review those steps, and turn each accepted segment into an ordinary editable scene. Capture becomes structured material for an explainer rather than a finished artifact you must work around.
The current Desktop web workflow and the product screenshots used here were
reviewed against [email protected]. The browser owns display selection and
permissions. Screen Recording is not presented as native mobile capture, and
shared audio remains browser- and source-dependent.
Why one giant recording is difficult to explain
Continuous capture is convenient when the goal is archival: press record, perform the task, stop. An explainer has a different job. It must establish context, direct attention, pause for comprehension, and sometimes rearrange the order in which ideas appear.
A ten-minute recording might contain only four useful learning moments. If those moments remain in one file, a small change can ripple through captions, annotations, narration, and camera timing. The author has to remember where every dependency lives.
Short steps create useful editorial seams. “Open settings,” “change the permission,” and “verify the result” are already meaningful units. They can be reordered, shortened, replaced, or explained independently.
Record around tasks, not arbitrary timestamps
Scribe's New Step control ends the current playable segment and starts the next segment over the same already-authorized capture stream. The browser does not ask you to select the source again at every boundary.
Use a new step when:
- the viewer moves to a different screen or task;
- the next moment needs a different annotation or camera focus;
- one part may need to be reordered later; or
- the current explanation has reached a natural learning boundary.
This is not about chopping footage into identical lengths. A useful step is as long as the idea requires, within the recorder's limits. Scribe currently caps an individual step at 60 seconds and the complete session at five minutes of active recording, which reinforces the product's role as an explainer-video recorder rather than a long-form capture suite.
Each accepted step becomes an editable scene
After stopping, review the real duration and size of every valid step. Add to project creates one scene per accepted step, with a normal Video-on-Canvas object in each scene.
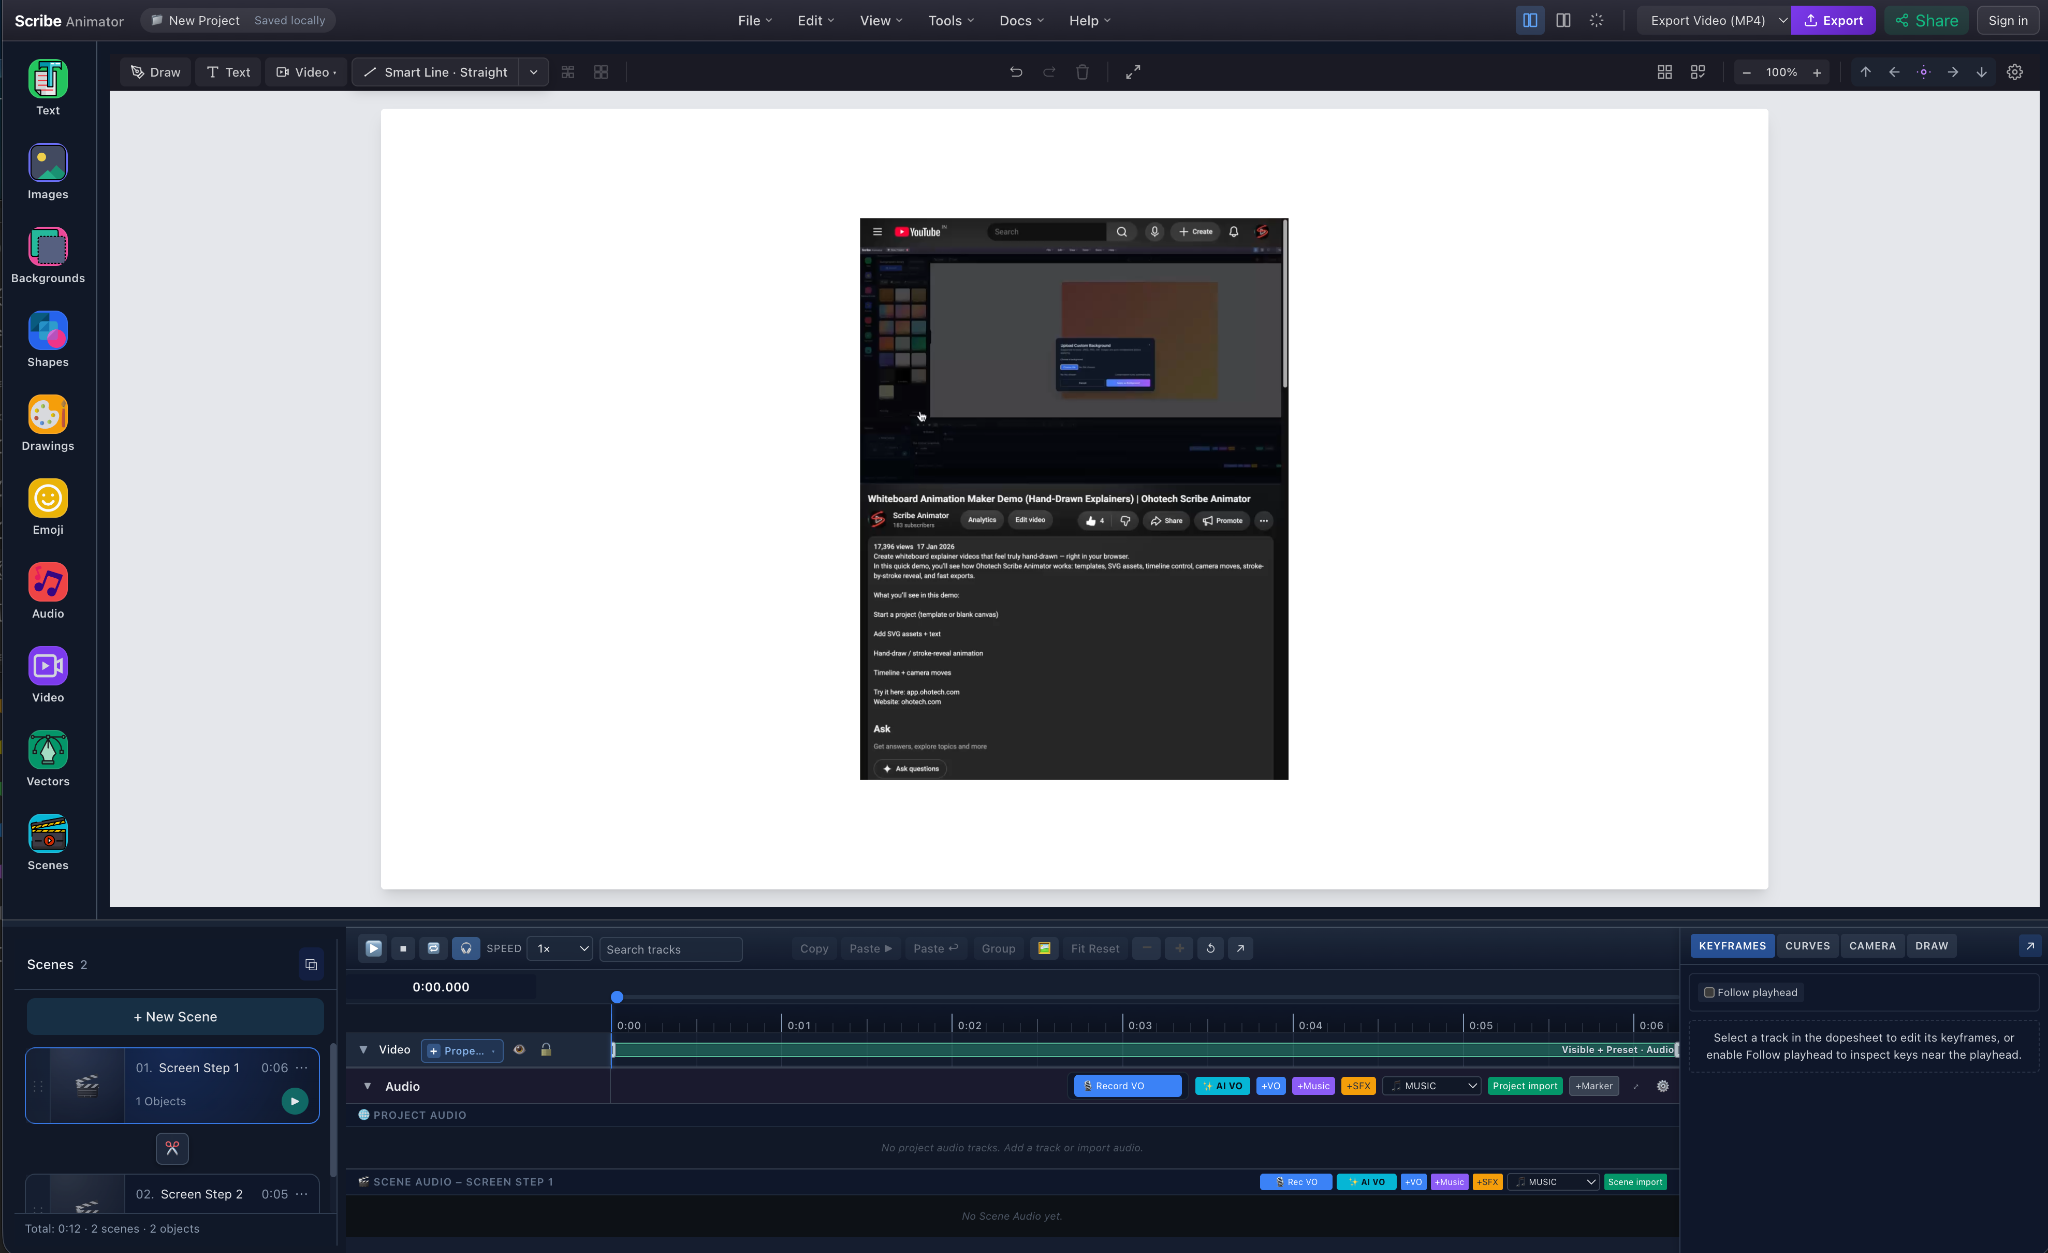
The recording is no longer a special capture session. Each step now lives in the scene list and on the shared timeline as editable material.
That transition is the key product idea. A recorded scene can use the same tools as imported footage:
- trim or split around the exact useful action;
- resize and crop the video on the canvas;
- hold a source frame with Freeze and Explain;
- layer text, highlights, drawings, and Smart Arrows;
- guide attention with camera moves;
- add project or scene narration; and
- preview and export the finished sequence.
The Video on Canvas guide covers those editing choices in detail. The Screen Recording feature page shows the complete capture-to-explainer story for someone evaluating the workflow.
Step structure makes later explanation cheaper
Imagine a tutorial with three tasks. The first is correct. The second needs a new callout. The third must move before the second. With a continuous clip, those changes can require destructive cuts or several linked timeline edits. With scene-per-step material, the author can reorder scenes, modify the one affected scene, and leave the others untouched.
The same structure helps when the explanation becomes more sophisticated. A scene can contain several visual and audio elements for one narrative idea. StoryBeats can record which objects, Draw Steps, property keys, camera keys, and narration segment belong to that idea. The recording provides the scenes; StoryBeats organize the relationships inside them.
For the broader timing argument, read StoryBeats: move narration, camera, drawings and keyframes together.
Capture permissions should stay visible
A screen recorder can see sensitive material, so the authority boundary matters. In Scribe, the browser owns the chooser for the tab, application window, or screen. Scribe cannot silently select or remember that source. The microphone is a separate optional permission.
Shared or system audio is never universal. A browser tab may provide an audio track while a window or full display does not. Operating-system policy, browser support, whether the source is producing sound, and chooser settings all affect the result. Test the exact source before recording an important narration.
Completed steps remain local-first. They are not silently uploaded during capture. If a signed-in creator later uses a cloud-backed project save, the normal storage and media-promotion rules apply.
When this workflow is the right fit
Choose step-based screen recording when the audience needs to understand a software process and the explanation will benefit from annotations, pauses, camera focus, narration, or later revisions. It is especially useful for product walkthroughs, onboarding lessons, support answers, and short internal procedures.
Choose a dedicated long-form recorder when you need hours of continuous capture, webcam composition, live streaming, or a broadcast-style production pipeline. Scribe's strength is turning short, user-owned footage into structured explainer scenes.
Start with a deliberate first take
Before recording, close private notifications, decide where the natural task boundaries are, and save a project checkpoint. Record a small session, add it to the project, and verify that every step plays as its own scene. Then try one Freeze and Explain hold or camera move before committing to a larger tutorial.
The maintained Screen Recording guide covers browser prerequisites, step rollover, review, audio behavior, limits, recovery, and result checks. If timing across several scene elements becomes the next challenge, continue with organizing explainer timing through StoryBeats.